Colosseum: Difference between revisions
Username1234 (talk | contribs) No edit summary |
mNo edit summary |
||
| Line 1: | Line 1: | ||
There are 4 | There are 4 Colosseums in [[Worlds#G3_-_Froggy_Fields|Blunder Hills]], [[Worlds#D2_-_The_Mimic_Hole|Yum-Yum Desert]], [[Worlds#F3_-_Snowfield_Outskirts|Frostbite Tundra]] and [[Worlds#H2_-_TV_Outpost|Hyperion Nebula]]. Each Colosseum costs different amounts of {{CraftReq|Colosseum Ticket}} to enter. In the Colosseum, you fight waves of enemies for rewards. | ||
All | All Colosseums feature the same basic mechanics: | ||
* You have 5 minutes to complete the | * You have 5 minutes to complete the Colosseum. Whether you clear all waves or run out of time, you'll receive reward chests at the end based on your final score. | ||
* There are 15 waves of monsters. The final wave includes a boss. All 15 waves + the boss must be cleared in order to earn Golden Chest rewards. | * There are 15 waves of monsters. The final wave includes a boss. All 15 waves + the boss must be cleared in order to earn Golden Chest rewards. | ||
* Pressing 'Next Round' will progress to the next round immediately, and increase your score multiplier. However, the more enemies there are on the screen, the faster your multiplier will decrease! You must defeat them quickly to maintain your score multiplier. | * Pressing 'Next Round' will progress to the next round immediately, and increase your score multiplier. However, the more enemies there are on the screen, the faster your multiplier will decrease! You must defeat them quickly to maintain your score multiplier. | ||
* Getting multi-kill combos also contributes to your score multiplier. | * Getting multi-kill combos also contributes to your score multiplier. | ||
* Clearing the full | * Clearing the full Colosseum with time remaining will earn you a Time Bonus, increasing your score. | ||
===Colosseum Tips=== | ===Colosseum Tips=== | ||
* Any increasing Mob's Health curse, such as [[Prayers#Big Brain Time|Big Brain Time]], causes slowing down wave and takes longer to complete Colosseum. | |||
* Use your active attacks (the ones you equip to your attack bar) strategically to take out waves. Turning off auto or turning off the "Use attacks in auto" option will ensure the AI doesn't waste your strongest moves. | * Use your active attacks (the ones you equip to your attack bar) strategically to take out waves. Turning off auto or turning off the "Use attacks in auto" option will ensure the AI doesn't waste your strongest moves. | ||
* If your damage and strategy are solid, increasing your | * If your damage and strategy are solid, increasing your Move Speed can help you finish within the time limit/set new high scores. If you don't need healing food/damage food, swap in Speed Potions. | ||
* If you die in the | * If you die in the Colosseum and don't have an Insta-Rez remaining, your Town Respawn will let you collect your rewards. | ||
*It is best to use your [[File:Divine Knight Class Icon.png|32px]] [[Divine Knight]] for | * It is best to use your [[File:Divine Knight Class Icon.png|32px]] [[Divine Knight]] for Colosseum die to its good AOE and drop rate multipliers from the {{Icons|Orb Of Remembrance|link=Divine Knight#Orb Of Remembrance|text=Orb Of Remembrance}} Talent. | ||
=Colosseums= | =Colosseums= | ||
| Line 68: | Line 69: | ||
| [[file:Astro Colosseum Stage.png|500px|link=Colosseum/Astro]] | | [[file:Astro Colosseum Stage.png|500px|link=Colosseum/Astro]] | ||
|} | |} | ||
__notoc__ | |||
Revision as of 18:10, 26 December 2023
There are 4 Colosseums in Blunder Hills, Yum-Yum Desert, Frostbite Tundra and Hyperion Nebula. Each Colosseum costs different amounts of ![]() Colosseum Ticket to enter. In the Colosseum, you fight waves of enemies for rewards.
Colosseum Ticket to enter. In the Colosseum, you fight waves of enemies for rewards.
All Colosseums feature the same basic mechanics:
- You have 5 minutes to complete the Colosseum. Whether you clear all waves or run out of time, you'll receive reward chests at the end based on your final score.
- There are 15 waves of monsters. The final wave includes a boss. All 15 waves + the boss must be cleared in order to earn Golden Chest rewards.
- Pressing 'Next Round' will progress to the next round immediately, and increase your score multiplier. However, the more enemies there are on the screen, the faster your multiplier will decrease! You must defeat them quickly to maintain your score multiplier.
- Getting multi-kill combos also contributes to your score multiplier.
- Clearing the full Colosseum with time remaining will earn you a Time Bonus, increasing your score.
Colosseum Tips
- Any increasing Mob's Health curse, such as Big Brain Time, causes slowing down wave and takes longer to complete Colosseum.
- Use your active attacks (the ones you equip to your attack bar) strategically to take out waves. Turning off auto or turning off the "Use attacks in auto" option will ensure the AI doesn't waste your strongest moves.
- If your damage and strategy are solid, increasing your Move Speed can help you finish within the time limit/set new high scores. If you don't need healing food/damage food, swap in Speed Potions.
- If you die in the Colosseum and don't have an Insta-Rez remaining, your Town Respawn will let you collect your rewards.
- It is best to use your
 Divine Knight for Colosseum die to its good AOE and drop rate multipliers from the
  Orb Of Remembrance Talent.
Colosseums
Dewdrop Colosseum
The ![]() is located at the
is located at the ![]() Froggy Fields, the second monster area of Blunder Hills, at the top right.
Froggy Fields, the second monster area of Blunder Hills, at the top right.
You need 1x ![]() Colosseum Ticket to enter. See Dewdrop Colosseum for wave info/reward info.
Colosseum Ticket to enter. See Dewdrop Colosseum for wave info/reward info.

|
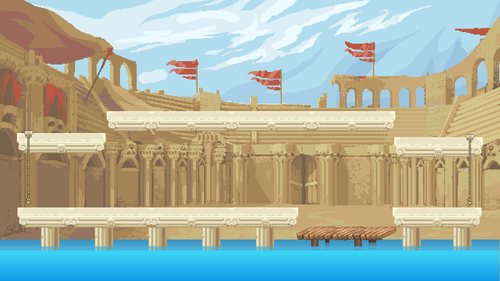
Sandstone Colosseum
The ![]() is located at
is located at ![]() The Mimic Hole, the second monster area of Yum Yum Desert, at the top right.
The Mimic Hole, the second monster area of Yum Yum Desert, at the top right.
You need 2x![]() Colosseum Ticket to enter. See Sandstone Colosseum for wave info/reward info.
Colosseum Ticket to enter. See Sandstone Colosseum for wave info/reward info.
|
Chillsnap Colosseum
The ![]() is located at the
is located at the ![]() Snowfield Outskirts, the second monster area of Frostbite Tundra, at the bottom right.
Snowfield Outskirts, the second monster area of Frostbite Tundra, at the bottom right.
You need 3x![]() Colosseum Ticket to enter. See Chillsnap Colosseum for wave info/reward info.
Colosseum Ticket to enter. See Chillsnap Colosseum for wave info/reward info.

|
Astro Colosseum
The ![]() is located at
is located at ![]() TV Outpost, the second monster area of Hyperion Nebula, at the bottom right.
TV Outpost, the second monster area of Hyperion Nebula, at the bottom right.
You need 6x![]() Colosseum Ticket to enter. See Astro Colosseum for wave info/reward info.
Colosseum Ticket to enter. See Astro Colosseum for wave info/reward info.

|