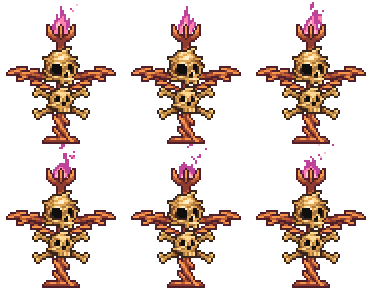
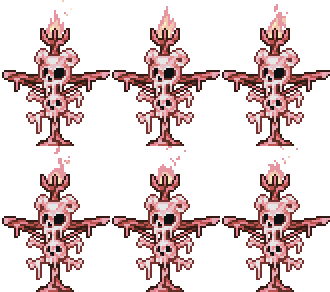
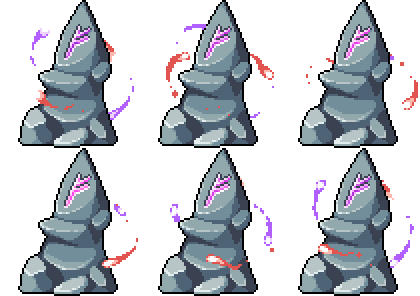
Worship is a World 3  Wizard Specialized Skill. It presents as a Tower Defence minigame. In this style, a portal will appear on an upper platform and spawn increasingly harder waves of units, which must be defeated before they reach the lower platform's Shrine.
You can either actively play the tower defence, or you can just press a 'Worship' button and get rewards based on your best performance. This means you can play it as much as you want, but you won't get left behind if you only want to play it a few times when you upgrade your towers or figure a better playstyle! For active gameplay, class abilities are not automatically engaged and must be manually cast even if otherwise automated.
To unlock the further Worship totems, you must reach the required Worship level. The first of these can be found in World 1, Forest Outskirts.
On early waves, multi-hit damage talents are helpful, but on later waves you'll be relying on towers to do enough damage. Some classes have active talents that can control the enemies in one form or another. Crowd control is always useful. See Class Usefulness.
Totems
Towers
For each enemy killed by either you or your towers, points are earned to place and upgrade further towers. These are first unlocked via the Construction table in World 3 town. There are also various sources for starting points such as vials, cards and stamps, meaning you can immediately place and/or upgrade one or multiple towers.
Enemy Types
Each Enemy during Worship can come in different sizes, ranks (skulls) and with different buffs (colors)
Each corresponding to different health pools, speeds, and Special Properties
Enemy Rank
| Ranks |
Skulls |
Health Scaling
|
| Normal |
 |
x1
|
| Copper |
 |
x4
|
| Iron |
 |
x13
|
| Gold |
 |
x60
|
| Platinum |
 |
x312
|
| Dementia |
 |
x1,846
|
| Lava |
 |
x12,231
|
| Lava Tier 2 |
 |
x89,742
|
| Lava Tier 3 |
 |
x723 K
|
| Lava Tier 4 |
 |
x6.4 M
|
| Lava Tier 5 |
 |
x60.5 M
|
| Lava Tier 6 |
 |
x620.5 M
|
| Lava Tier 6 |
 |
x6.8 B
|
| Lava Tier 6 |
 |
x80.4 B
|
| Lava Tier 6 |
 |
x1 T
|
| Lava Tier 6 |
 |
x13.4 T
|
| Lava Tier 6 |
 |
x187.7 T
|
Enemy Size
| Size
|
Speed
|
Health
|
Notes
|
| Zoomo
|
High Speed
|
Low health
|
Fast but fragile and spawn in large groups
|
| Normo
|
Average Speed
|
Average Health
|
Typical enemy, whaddya expect?
|
| Largo
|
Low Speed
|
High Health
|
Can appear in boss waves.
|
| Gigao
|
Very Low Speed
|
Very High Health
|
Can't be knocked back with Pulse Mages Knockback Skill, Only appears in boss waves.
|
Enemy Color
| Colors
|
Special Properties
|
| Grey
|
Normal, your average mob.
|
| Green
|
Heals continuously when below 50% HP.
|
| Red
|
Applies a healing buff to nearby monsters when killed.
|
| Blue
|
Goes invincible for a short time after taking 5 hits. Can still be slowed by Frozone towers or pushed by Kraken minions while invincible.
|
| Orange
|
Explodes on death, stunning all nearby towers for a while.
|
| Purple
|
Teleports forward every time they are hit.
|
Class Usefulness
| Class
|
Description
|
Talents
|
| Hunter
|
Good for crowd control and some multi-hit attacks.
|
|
| Wizard
|
Has some crowd control and some multi-hit attacks.
|
- Ice Shards - Multi-hit, Slow. No benefit beyond lvl 1. Requires wand.
- Floor Is Lava - Multi-hit. Higher lvl affects a wider area
- Tornado - Multi-hit. Higher lvl makes tornadoes last longer
- Fireball - Multi-hit. Limited area of effect.
|
| Journeyman
|
Limited crowd control and multi-hit.
|
- Indiana Attack - Multi-hit. Pulls enemies towards the Journeyman. Higher level pulls more enemies at once.
|
Prayers

Unlock new prayers by reaching specific wave progression in the Worship Tower Defense. Prayers give both a Boost (like +% exp) and a Curse (like +% monster HP) at the same time. The number of Prayers you can equip at once is based on the level of your BEST wizard!
Prayer calculators are on the main Prayers page, but a table of their effects are listed below.
Prayers
| Wave Unlocked |
Prayer |
Bonus |
Range |
Curse |
Range
|
 10 10 |
 Big Brain Time Big Brain Time |
x% Class EXP |
30 - 177 |
x% Max HP for all monsters |
250 - 1475
|
 25 25 |
 Skilled Dimwit Skilled Dimwit |
x% Skill Efficiency |
30 - 177 |
-x% Skill EXP Gain |
20 - 118
|
 51 51 |
 Unending Energy Unending Energy |
x% Class and Skill EXP |
25 - 147.5 |
Max AFK Time is now 10 hours. |
—
|
 81 81 |
 Shiny Snitch Shiny Snitch |
Shiny Critters drop in bundles of x instead of 1 |
20 - 118 |
Shiny chance is x times lower. |
15 - 88.5
|
 121 121 |
 Zerg Rushogen Zerg Rushogen |
x% AFK Gain Rate |
5 - 14.5 |
-x% Carry Capacity |
12 - 34.8
|
 11 11 |
 Tachion of the Titans Tachion of the Titans |
Giant Monsters can now spawn on Monster Kill |
— |
Giant Monsters can now spawn… |
—
|
 31 31 |
 Balance of Precision Balance of Precision |
x% Total Accuracy |
30 - 177 |
-x% Total Damage |
5 - 29.5
|
 71 71 |
 Midas Minded Midas Minded |
x% Drop Rate |
20 - 118 |
x% Max HP for all monsters |
250 - 1475
|
 101 101 |
 Jawbreaker Jawbreaker |
x% Coins from Monsters |
40 - 236 |
x% Max HP for all monsters |
200 - 1180
|
 21 21 |
 The Royal Sampler The Royal Sampler |
x% 3D Printer Sample Size |
15 - 43.5 |
-x% All EXP Gain. Remove all samples to Unequip. |
30 - 87
|
 41 41 |
 Antifun Spirit Antifun Spirit |
x% Minigame Reward Multi |
700 - 1130 |
Minigames cost x plays per attempt |
9 - 17.1
|
 71 71 |
 Circular Criticals Circular Criticals |
x% Critical Hit Chance |
10 - 29 |
-x% Critical Damage |
15 - 43.5
|
 111 111 |
 Ruck Sack Ruck Sack |
x% Carry Capacity |
30 - 117 |
-x% AFK Gain Rate |
15 - 88.5
|
 21 21 |
 Fibers of Absence Fibers of Absence |
x% Kills for Deathnote and opening portals |
30 - 117 |
-x% Total Damage |
15 - 88.5
|
 51 51 |
 Vacuous Tissue Vacuous Tissue |
100% Dungeon Credits and Flurbos from Boosted Runs |
— |
Use 2x Dungeon Passes per run. |
—
|
 121 121 |
 Beefy For Real Beefy For Real |
x% Total Damage |
20 - 98 |
-x% Total Defence and Accuracy |
10 - 49
|
 21 21 |
 Balance of Pain Balance of Pain |
x% Multikill per Dammage Tier |
8 - 31.2 |
-x% Total Defence and Accuracy |
15 - 58.5
|
 51 51 |
 Balance of Proficiency Balance of Proficiency |
x% Skill EXP Gain |
30 - 177 |
-x% Skill Efficiency |
20 - 118
|
 131 131 |
 Glitterbug Glitterbug |
x% chance for Giant Mobs to summon 2 Crystal Mobs |
30 - 117 |
Giant Mobs are x% less likely to spawn. |
20 - 78
|
Skulls
Worship Bonuses
Waves
Due to the Wave calculations being rather expensive performance wise, they have been moved to their own sub pages.
 Slow Roast Wiz
 Carbon